Test automation with Appium & Jetpack Compose
The use of the following test frameworks and test tools has been evaluated and tested. Other common frameworks and test tools are under evaluation. If you have any questions about using your preferred test tools, please feel free to
Test your Android Jetpack Compose app with Appium on the Mobile Device Cloud devices
To test a Jetpack Compose app with Appium, the corresponding Espresso driver must be used.
The following description shows you the procedure:
import io.appium.java_client.AppiumBy;
import io.appium.java_client.android.AndroidDriver;
import org.junit.*;
import org.openqa.selenium.WebElement;
import org.openqa.selenium.remote.DesiredCapabilities;

import java.net.MalformedURLException;
import java.net.URL;

public class EspressoTest {

    private final String CLOUD_ACCESS_KEY = "<ACCESS_KEY>";
    private final String APP_PATH = "cloud:<APP_BUNDLE_ID>";
    private final String ESPRESSO_SERVER= "<ESPRESSO_SERVER_UNIQUE_NAME>";
    protected AndroidDriver driver = null;
    private final DesiredCapabilities dc = new DesiredCapabilities();

    @Before
    public void setUp() throws MalformedURLException {
        dc.setCapability("accessKey", CLOUD_ACCESS_KEY);
        dc.setCapability("app", APP_PATH);
        dc.setCapability("espressoServerUniqueName", ESPRESSO_SERVER);

        dc.setCapability("platformName", "Android");
        dc.setCapability("automationName", "Espresso");
        dc.setCapability("deviceQuery", "@os='android' and @category='PHONE'");
        dc.setCapability("testName", "Quick Start Espresso Demo");
        dc.setCapability("appium:appiumVersion", "2.0.0.beta.23");

        driver = new AndroidDriver(new URL("https://mobiledevicecloud.t-systems-mms.eu/wd/hub"), dc);
        driver.setSetting("driver", "compose");
    }

    @Test
    public void quickStartEspressoDemo() {
        WebElement text = driver.findElement(AppiumBy.tagName("myTextTag"));
        Assert.assertEquals("Hello Espresso!", text.getText());
        driver.findElement(AppiumBy.tagName("myButtonTag")).click();

        driver.findElement(AppiumBy.tagName("myInputTag")).sendKeys("Mobile Device Cloud");
        driver.hideKeyboard();
        driver.findElement(AppiumBy.tagName("myInputButtonTag")).click();

        WebElement keywords = driver.findElement(AppiumBy.tagName("myKeywordsTag"));
        Assert.assertEquals("Mobile Device Cloud", keywords.getText());
    }

    @After
    public void tearDown() {
        System.out.println("Report URL: "+ driver.getCapabilities().getCapability("reportUrl"));
        driver.quit();
    }
}
First steps with Appium + Jetpack Compose
1.
2.
3.
4.
5.
6.
1. Download demo project
Download our
2. Install Espresso Driver
In addition to your app to be tested, a server app is also required for Espresso tests. This is built automatically by the Espresso driver for Appium. For this, you need to install a local Appium server. Download
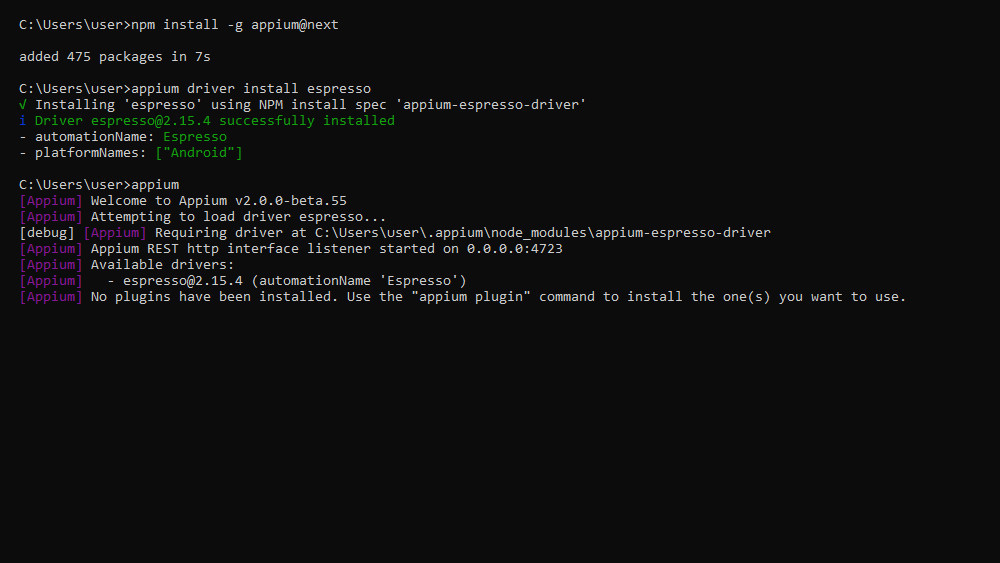
Then install Appium 2 and the Espresso driver in the terminal using the following commands:
npm install -g appium@next
appium driver install espresso
Now start the Appium server with the command:
appiumThe following messages should now appear:
3. Complete missing information
Open the EspressoSetup.java File. In this file there are two placeholders that you have to fill:
<LOCAL_APPIUM_SERVER>: The URL to the REST interface of your local Appium server. This is displayed in the terminal when the server is started. (e.g. http://0.0.0.0:4723)
<APK_PATH>: The path to the APK file of your app that you previously generated with Android Studio. (Build → Build APK)
4. Run setup
Start an emulator in Android Studio or connect a real Android device to your computer.
Start the EspressoSetup.java file either in run or debug mode. The setup is complete when the tests have run successfully.
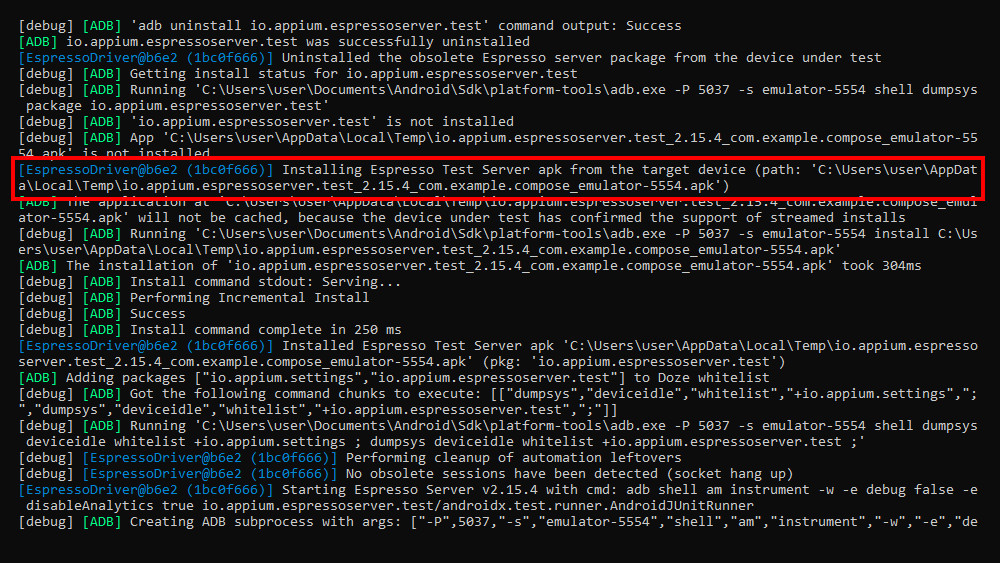
During the setup, some information is displayed in the Appium Server terminal. This includes the line:
"Installing Espresso Test Server apk from the target device ..." with a path to the Espresso server APK. Copy this APK together with the APK of your app into a common folder to find them again later.
NOTE: The Espresso server depends heavily on your app. Therefore, it must always be rebuilt using the setup if dependencies in your app change.
5. Upload apps
Upload your app and the Espresso server to the Mobile Device Cloud.
Assign a unique name to the Espresso server.
6. Start tests
Fill in the placeholders in the file MdcEspressoTest.java with your data.
Start the tests in Run or Debug mode. These are now executed in the Mobile Device Cloud.
You can use the examples to implement your own tests!