Mobile app testing & automation with Espresso
The use of the following test frameworks and test tools has been evaluated and tested. Other common frameworks and test tools are under evaluation. If you have any questions about using your preferred test tools, please feel free to
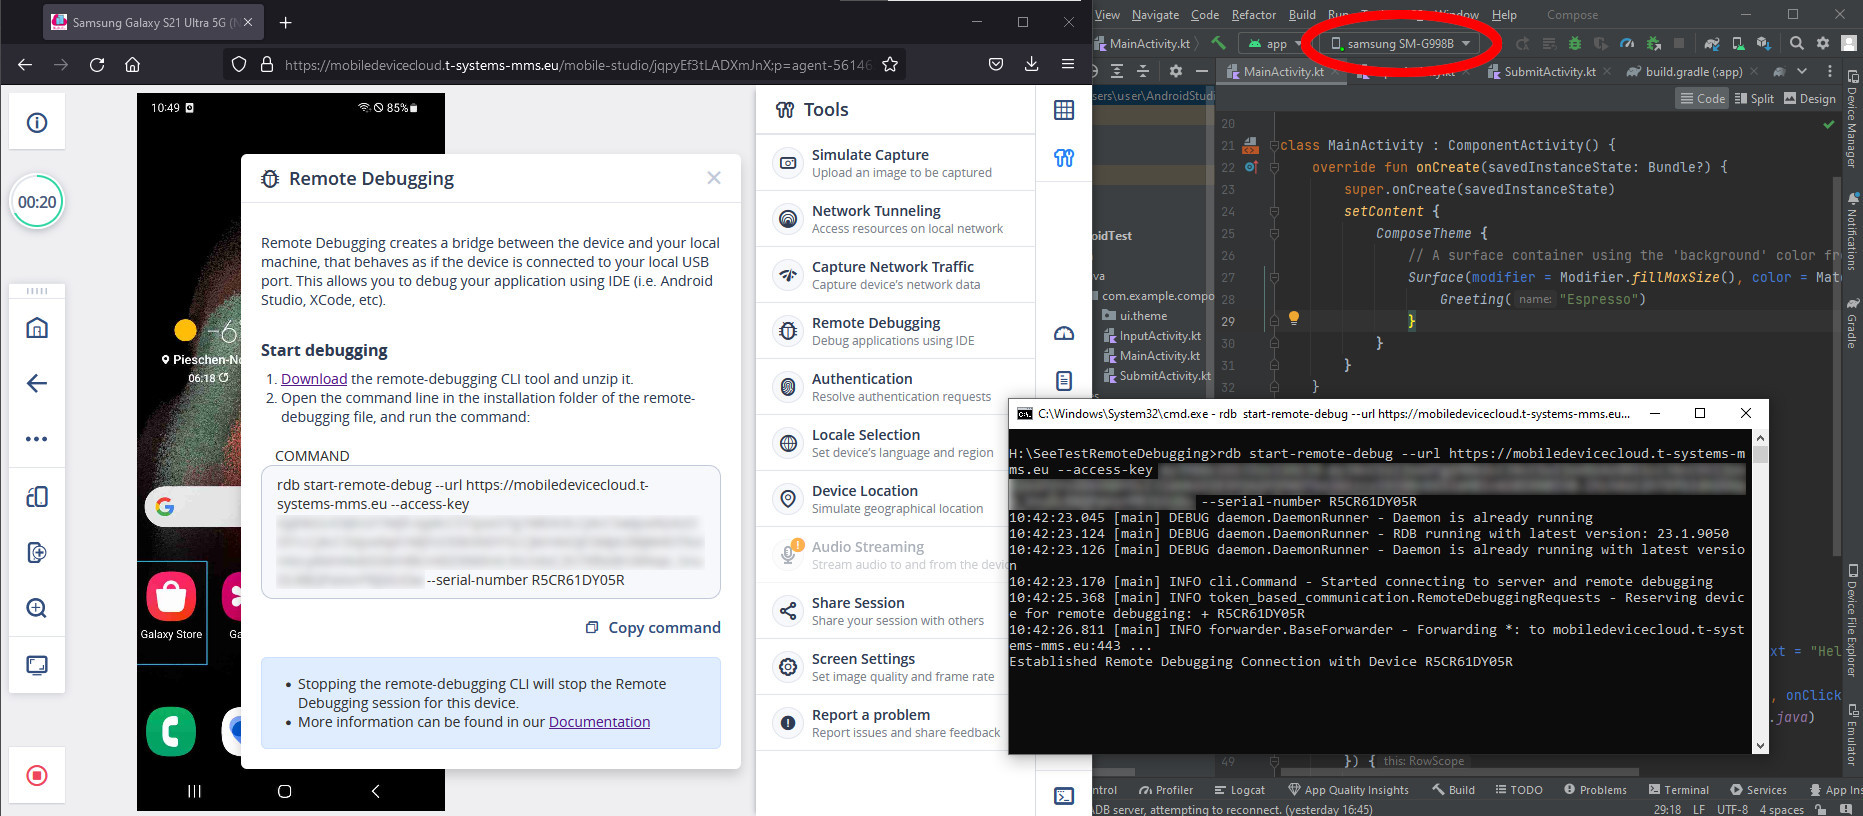
1. Remote debugging
Using remote debugging, you can run your Espresso tests in the Mobile Device Cloud as you would on a local device. To do this, download the remote debugging client:
-
for
Windows -
for
MacOS
and open a terminal in the client's folder.
Borrow a device in the Mobile Device Cloud and click on Tools → Remote Debugging. Copy the displayed command into the terminal and execute it. Now the device is displayed in Android Studio like a local device and can be used as such.
You will find detailed instructions
2. REST interface
Another way to run Espresso tests is via our REST interface.
To do this, generate an APK file for your app to be tested and an APK file for your tests. You can find the exact steps
Pass the two APKs to our API:
curl --request POST \
  --url https://mobiledevicecloud.t-systems-mms.eu/api/v1/test-run/execute-test-run \
  --header 'Authorization: Bearer <accesskey>' \
  --header 'content-type: multipart/form-data' \
  --form 'executionType=espresso' \
  --form 'runningType=coverage' \
  --form 'testApp=@<Pfad zur Test-App>' \
  --form 'app=@<Pfad zur App>' \
  --form-string "deviceQueries=@os='android'"
You can find documentation of the interface